Before You Record
WalkPunch works best when your video has clear narration, steady framing, and a logical route through the job site. You do not need special equipment. A current iPhone or Android phone is enough, as long as the file is MP4, MOV, or M4V and under 512 MB.
Use this simple field setup:
- Charge your phone before the walkthrough.
- Clean the camera lens.
- Turn off loud music, compressors, or fans where possible.
- Record in landscape if you want wider room context, or portrait if your team mostly reviews items on phones.
- Walk in a consistent order: exterior, entry, main level, upper level, lower level, then mechanical or utility areas.
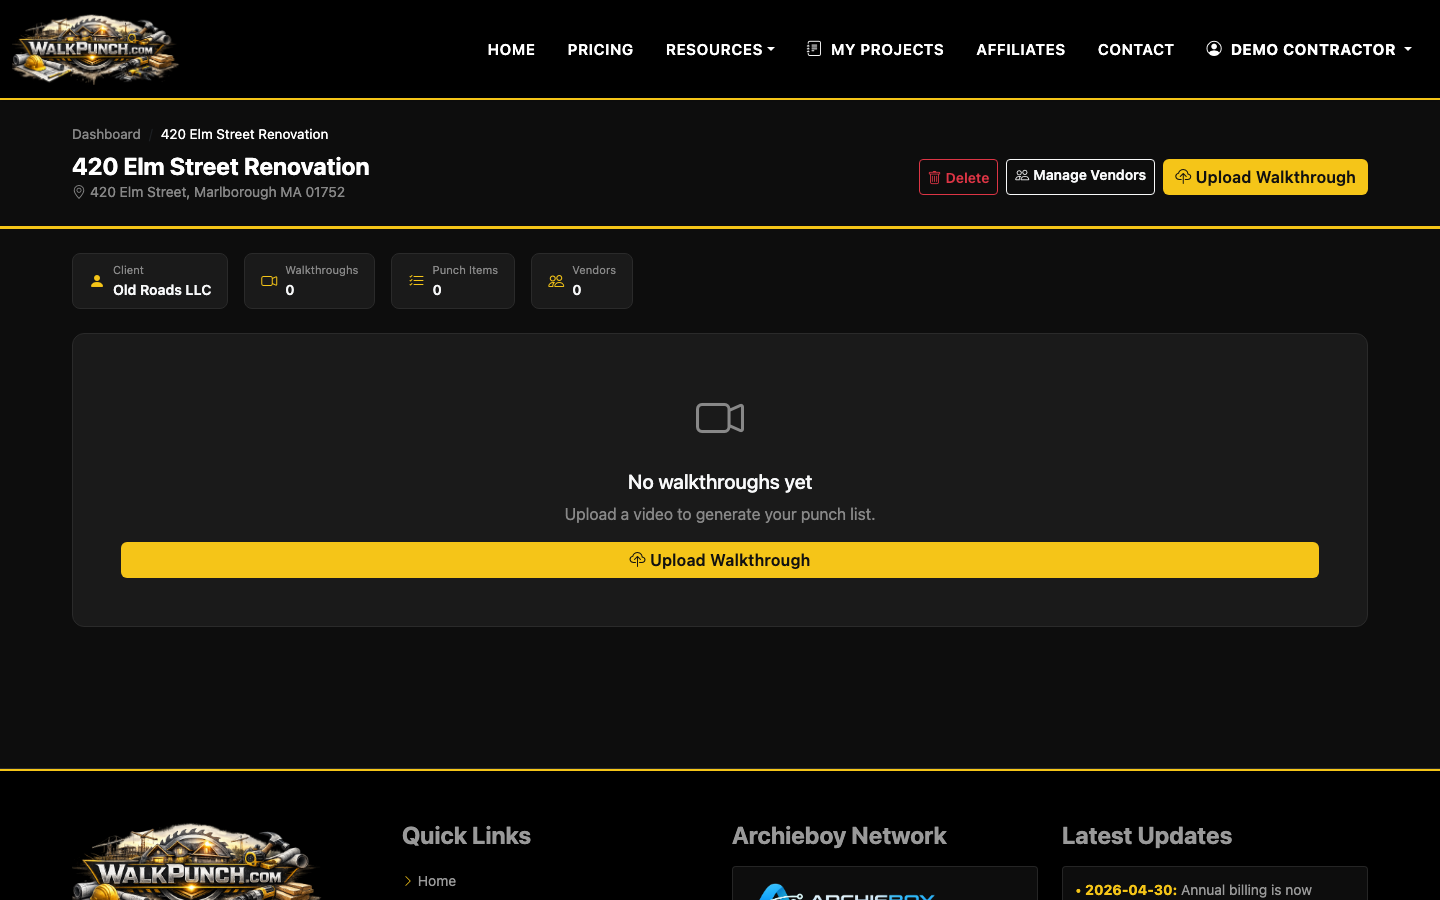
Step 1: Create the Project
Start by creating a project for the job. Add the project name, address, client, job number, and any notes that will help you identify the walkthrough later.
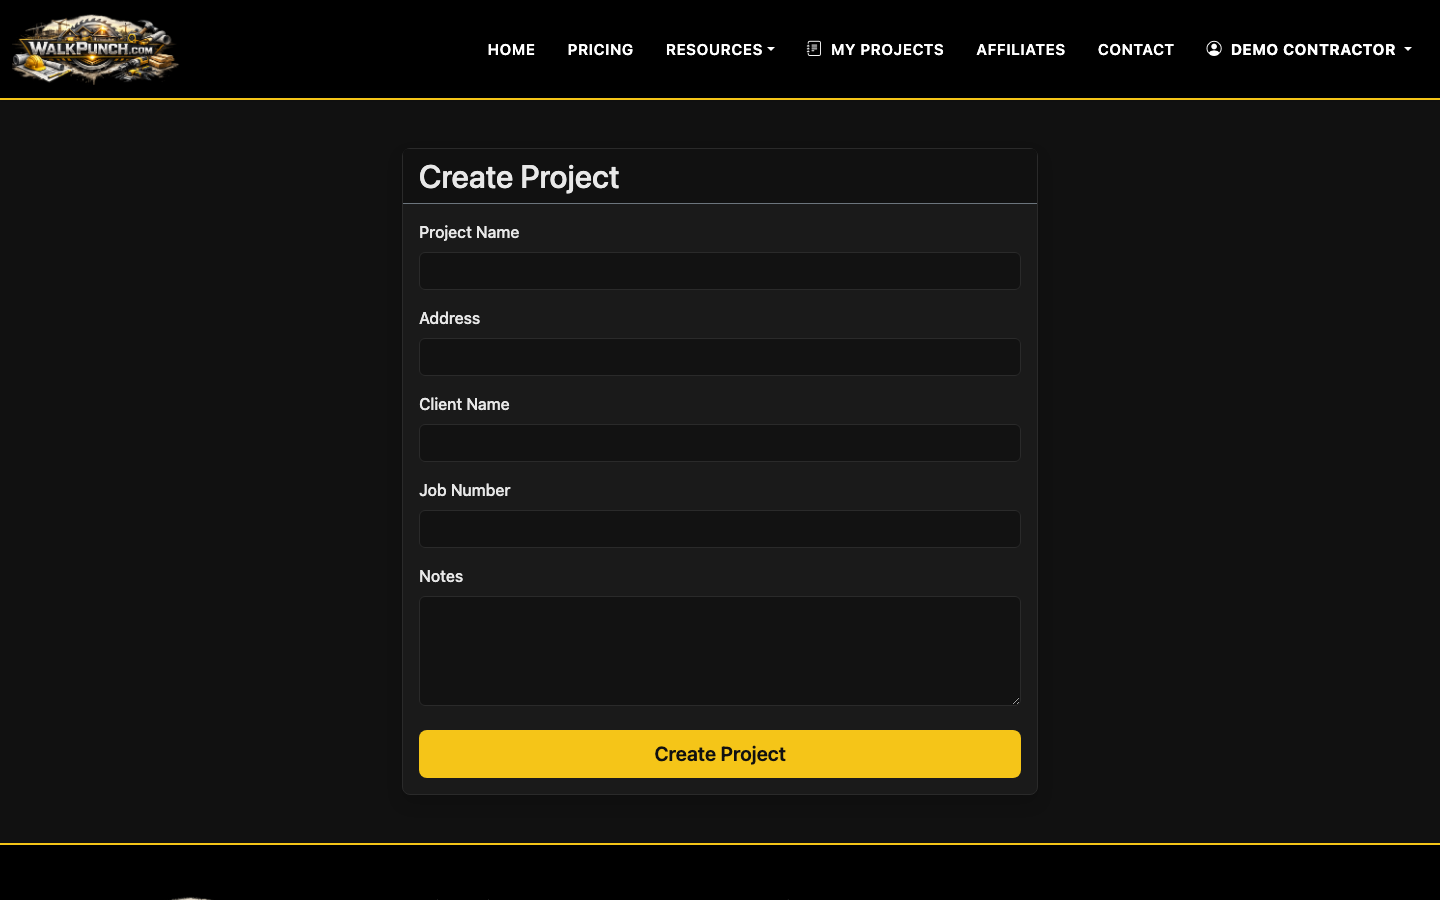
Use a naming convention your team can scan quickly. For example: “Maple Ridge - Final Punch - Unit 203” is more useful than “Walkthrough 3.” If you manage several jobs at once, include the phase or unit in the title.
Step 2: Record the Walkthrough Video
When you record, narrate each issue as if you are leaving instructions for someone who is not standing beside you. The camera should show the surrounding area first, then move closer to the defect.
A strong item sounds like this:
- “Primary bathroom, vanity wall. Paint touch-up needed above the left outlet. Drywall finisher or painter. Medium priority.”
- “Kitchen island. Missing cabinet pull on the trash drawer. Cabinet trade. Low priority.”
- “Front entry. Door latch is rubbing and not closing cleanly. Door hardware or trim carpenter. High priority.”
Try to keep each item to one clear sentence before moving to the next issue. You can still talk naturally, but avoid stacking five defects into one long ramble.
Step 3: Upload the Video
Open the project and go to the upload screen. Drag and drop your MP4, MOV, or M4V file, or choose it from your device.
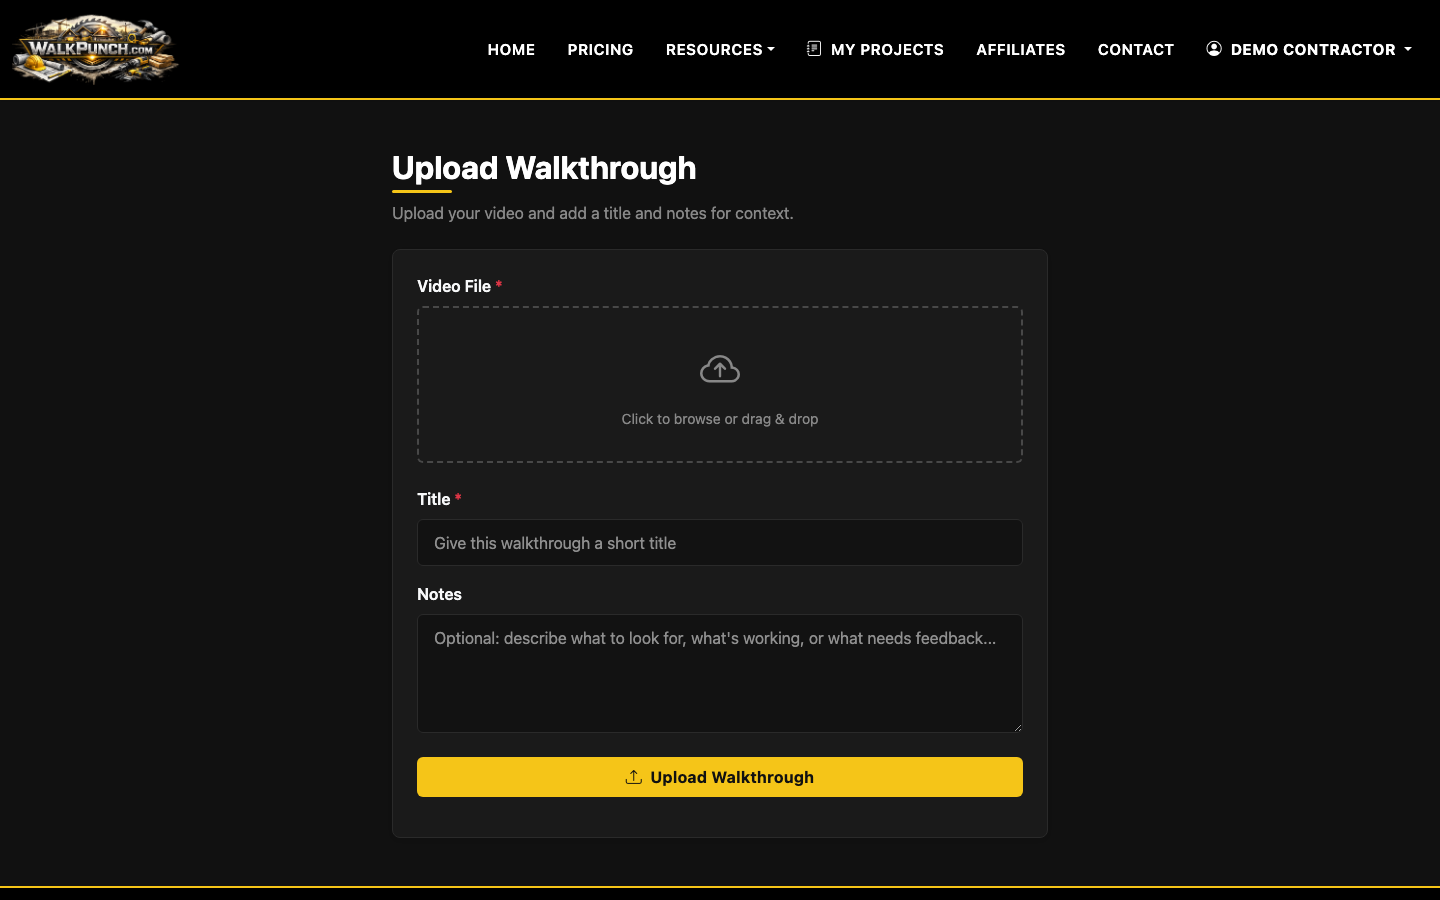
WalkPunch transcribes the audio with OpenAI Whisper, then uses GPT to extract individual punch items from the narration. It also captures evidence frames from the video around the timestamp where each issue is mentioned.
If your upload fails, check the basics first: supported format, file size under 512 MB, and a stable connection. For longer walkthroughs, splitting the job by floor or unit is often cleaner than trying to force one huge file through the workflow.
Step 4: Review the Extracted Punch List
After processing, review the AI-generated punch list on the project detail page. Items are grouped by trade and include editable fields such as title, description, location, trade, priority, and status.
This is where you turn a good draft into a clean deliverable. Check that each item is separate, assigned to the right trade, and described clearly enough for the subcontractor to act on it. If two issues were combined, split the thought manually by editing or adding an item. If the AI inferred the wrong trade, correct it before exporting.
You can also drag items into the order you want and approve or delete items in bulk. That matters on larger jobs where the first AI pass may include duplicate comments, side remarks, or items you mentioned but decided not to assign.
Step 5: Add Vendors for Auto-Assign
If you regularly send punch items to the same subcontractors, add vendor contacts by trade. WalkPunch can use the trade classification to help Auto-Assign extracted items to the right contact.
This is especially useful for finish stages where painters, cabinet installers, electricians, plumbers, and cleaners may all have small open items on the same walkthrough. Keeping contacts current reduces the manual work after each video.
Step 6: Export or Email the Punch List
Once the list is reviewed, you can export a trade-grouped PDF package as a ZIP or send per-item PDFs to vendors with evidence images included. That gives each subcontractor a focused list instead of a messy whole-project document.
For a broader documentation workflow, see How to Organize a Walkthrough Document. A video walkthrough is fastest for field capture, but the final punch still needs structure: trade, location, priority, status, and proof.
Practical Recording Checklist
Before you hit record, run this checklist:
- Start each room by naming it out loud.
- Point the camera at the full area before zooming into the issue.
- Speak one punch item at a time.
- Mention likely trade when you know it.
- Mention priority only when it changes the schedule.
- Pause briefly between unrelated items.
- Avoid recording private conversations, lockbox codes, or sensitive client details.
The goal is not a perfect video. The goal is a video that can become a punch list without someone rewatching the whole walkthrough three times.